Tips for Sunrise Photography with the Z 9

Z 9, NIKKOR Z 100-400mm f/4.5-5.6 VR S lens at 100mm, 1/200 sec., f/18, ISO 64.
There’s no better way to start the day off than to photograph the sun as it peeks above the horizon. It may be early, and you may still be half asleep as you wait for the sun to make its appearance but capturing those precious moments before and after sunrise makes waking up at sometimes unthinkable hours worthwhile.
As the world around you slowly wakes it’s just you, mother nature and a beautiful skyline in front of you as you click away with your camera, experiencing the joys of sunrise photography.

Z 9, NIKKOR Z 24-120mm f/4 S lens at 36mm, 60 sec., f/8, ISO 64.
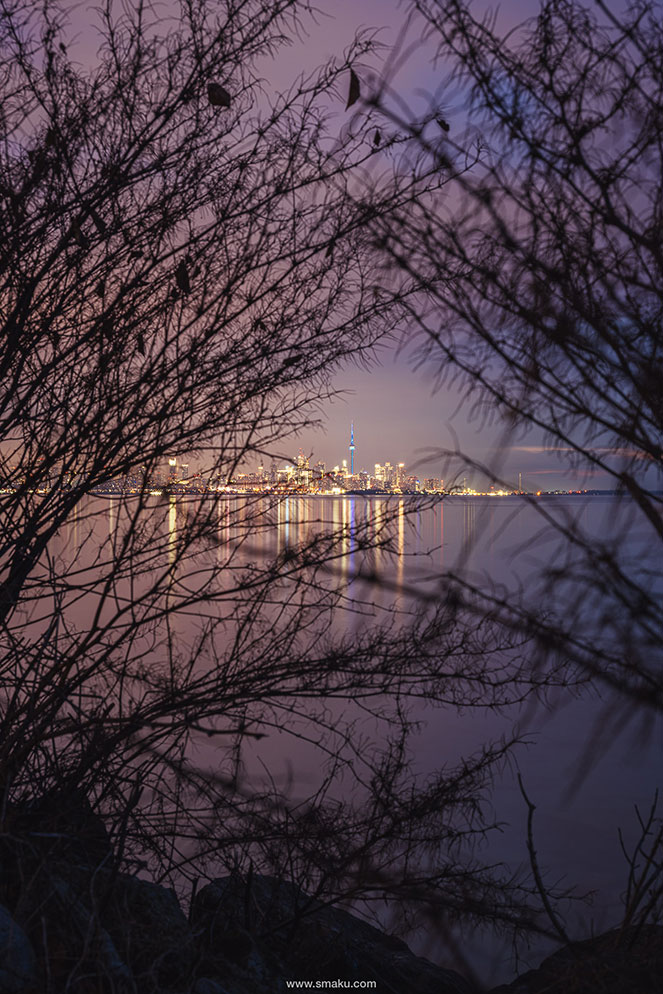
Capturing the beauty of the city, or a natural landscape as it wakes means you’ll be getting to your location in the dark.
3 key sunrise photography tips
-
Pre-plan your location by scouting during the day for a great location with a compelling composition. This will allow you to focus on taking the photo at sunrise rather than losing precious time walking around looking for a great shot.
-
Bring a steady tripod. You’ll be shooting in low-light situations so a tripod is almost always necessary—especially when capturing those calm moments before the sun rises.
-
Use a remote, the camera’s timer mode, or the SnapBridge app to release the shutter without touching the camera to minimize any movement when snapping the photo.
When you photograph at night or in low-light scenarios, your eyes will need some time to adjust to the dark. Looking through your viewfinder or LCD screen will bring up bright menu options and display information which can be a deterrent in keeping your night vision.
The Nikon Z 9 incorporates new menu options that will help you in this case.
With the Warm Display Colors Mode 2 selected, the playback of images and the display of your scene is shown normally, but the menus and icons are shown in red tones.
Warm Display Colours:
Custom Setup > Shooting/Display > D10
Mode 1
Turns the entire screen, display info., and menu options red. Useful for moments when your subject may have bright lights.
Mode 2
Turns just the display info. and menu options red, leaving you to see the scene as-is. Useful when your scene does not contain a lot of bright lights or contains details you want to see, like in astrophotography.
Warm colour display brightness:
This allows you to lighten or darken the brightness of the red colour by up to 3 steps on either side.
Starlight View:
Custom Setting Menu > Shooting Display > D9
This option brightens the Live View display allowing you to compose in the dark. When this setting is ON, changing the camera settings will not alter the Live View display.
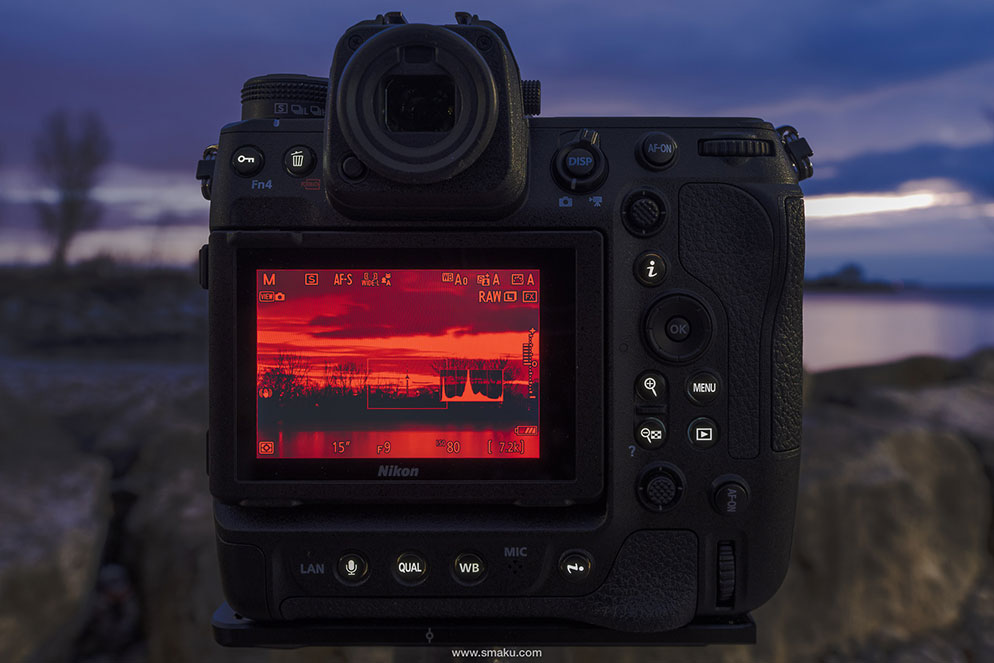
With the Warm Display Colors Mode 1 selected, the menus and icons surrounding the EVF display, playback of images and the display itself are all shown in red tones.
Backlight Button Illumination:
Rotating the power switch to the light icon will activate the backlights for the buttons and control panels. The backlights Illuminates selected buttons on the back of the camera. The backlights will remain illuminated for a few seconds after the switch is released, making it easy to navigate the back of the camera in the dark.
Glove Mode:
Setup Menu > Touch Control > Glove Mode
While not specific to low-light scenarios, another option on the Nikon Z 9 allows for easier navigation of the menu system when you are wearing gloves. This is particularly useful when shooting during the cold winter months.
Remember to turn this OFF when not in use as it would be too sensitive to the touch by non-glove wearing hands.
Z 9, NIKKOR Z 14-24mm f/2.8 S lens at 22mm, 90 sec., f/9, ISO 64.
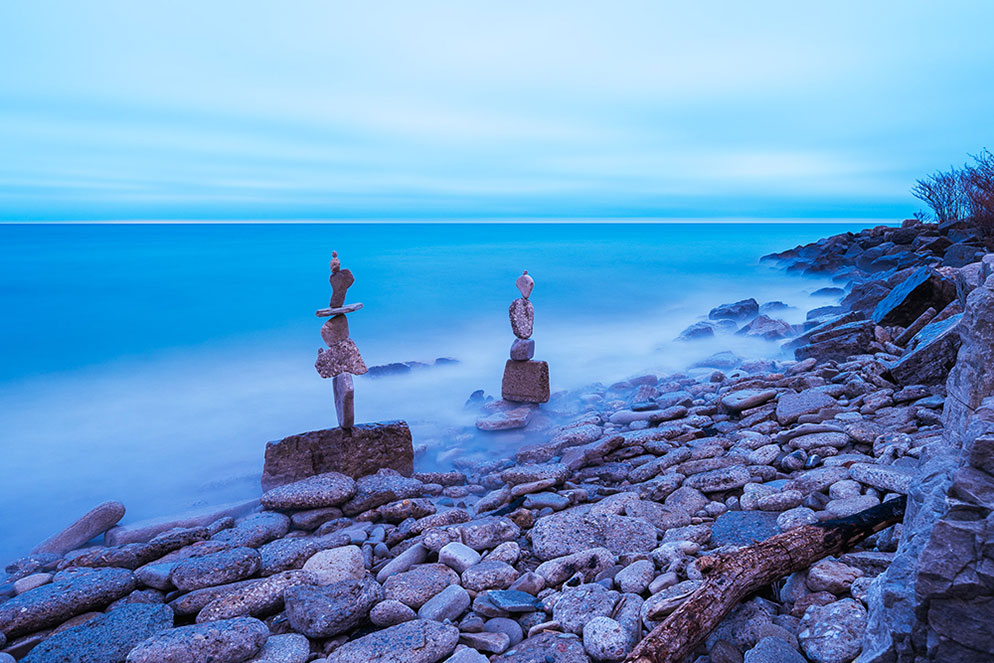
Extended shutter speeds:
Custom Settings Menu > Shooting/display > D5 Extended shutter speeds (M)
When set to ON, this enables shutter speeds beyond 30 seconds to be selected when changing the shutter speed in mode M.
This is a useful option to keep enabled if you frequently create long exposure photographs. During those times before sunrise, this will allow you to easily create long exposures of a minute in length or longer, which can create an ethereal mood in your photos.
Z 9, NIKKOR Z 100-400mm f/4.5-5.6 VR S lens at 240mm, 20 sec., f/9, ISO 64.
Use the tilting the LCD screen
Often, our first instinct is to put our camera at eye-level. While there is nothing wrong with this, try experimenting with different perspectives. Just a little shift in camera position will change the resulting image significantly.
Use the Z 9’s tilting LCD screen to your advantage by experimenting with various perspectives. Put the camera on the ground and tilt the LCD screen up so you can see exactly what your camera is seeing. The Z 9 allows you to tilt the LCD screen up in portrait orientation, which is vital for those portrait shots with unique perspectives.
The LCD screen of the Z 9 can tilt out, even when shooting vertically, making it easier to compose images with the camera on a tripod. Z 9, NIKKOR Z 24-120mm f/4 S at 48mm focal length, 60 sec., f/7.1, ISO 80.
Most importantly, don’t forget to take in the sunrise with your own eyes—this lasting impression will make you want to come back for more. It’s my favourite time for photography and I hope you will agree: To experience the wonders of mother nature as the city slowly wakes right before your very eyes is always worth the early wake-up call in my books!