Photographing the Night Sky: Star Trails
D3, AF-S NIKKOR 14-24mm f/2.8G ED, f/4, 1600 ISO, seventy 30 sec. exposures were made and stacked in Photoshop using Image Statistics, and a stack mode of Maximum.

Photographing Star Trails is a unique way to capture the night sky in a photograph. A star trail occurs when you photograph the stars over a long period of time, from minutes to hours. We spoke with two photographers—Deborah Sandidge and Diana Robinson—to find out their techniques and tips for great star trail images.
Many photographers use a technique of shooting multiple, shorter length, time exposures and stack them during post-production, using Adobe Photoshop or another program that will allow you to stack multiple files into one photograph. This allows them to produce a more dramatic effect in the final image. Another reason to use shorter exposures is to reduce the occurrence of noise that can show up in an image captured during long exposure shooting. In addition to shooting multiple images and stacking them, using as low an ISO as possible will also limit noise in the final image.
To simplify the process of shooting the individual shots every few minutes, Deborah sets her camera’s interval timer to make the consecutive images. The built-in interval timer can be found under the shooting menu. (Check your camera’s manual to see if your specific model incorporates this feature. —Editor)
Deborah says, “I stack stars because it gives me more flexibility with the outcome of an image.” She creates most of her star trail photographs using an exposure time of 30 seconds; making a number of photographs over the course of three-quarters of an hour or so. She then stacks these images which composites the images using Statistics, in Adobe Photoshop.
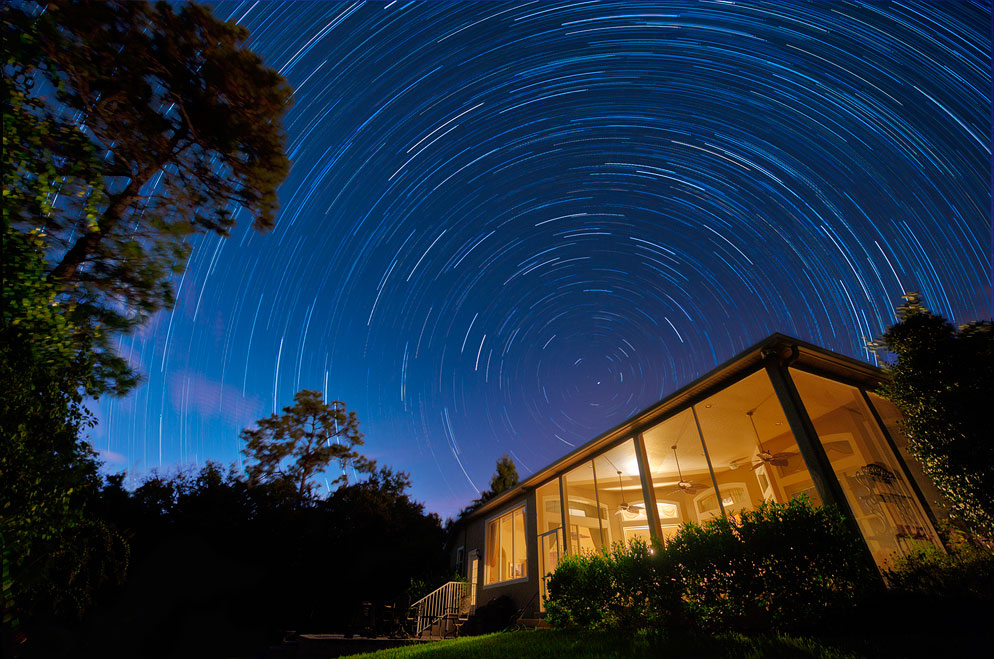
“I will often composite a foreground using HDR to blend with the final image,” says Deborah. “This helps prevent any detail from being lost in the highlight and shadow areas of a foreground area that isn’t in silhouette.”
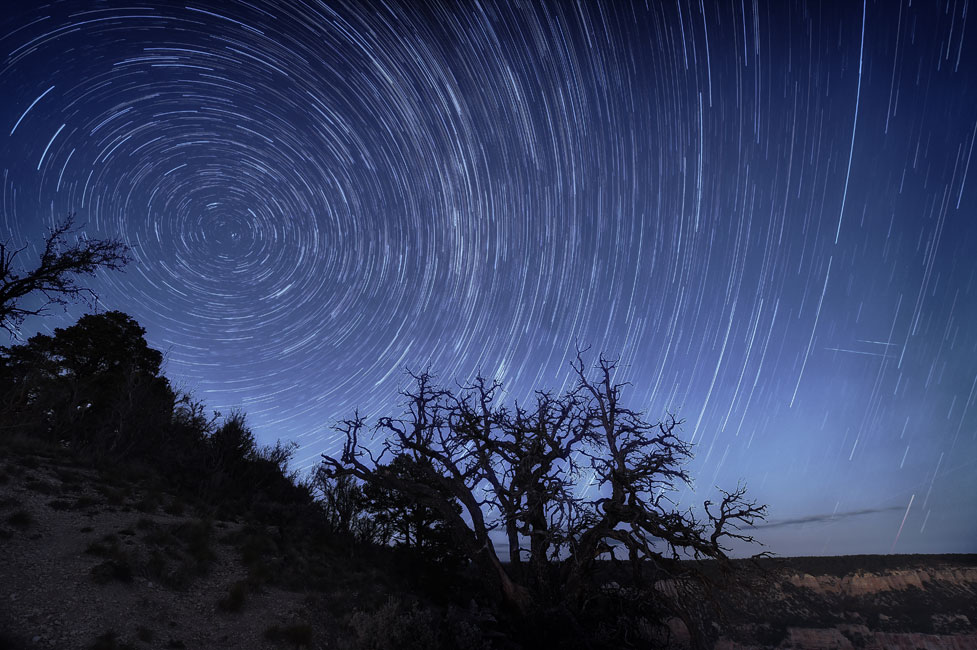
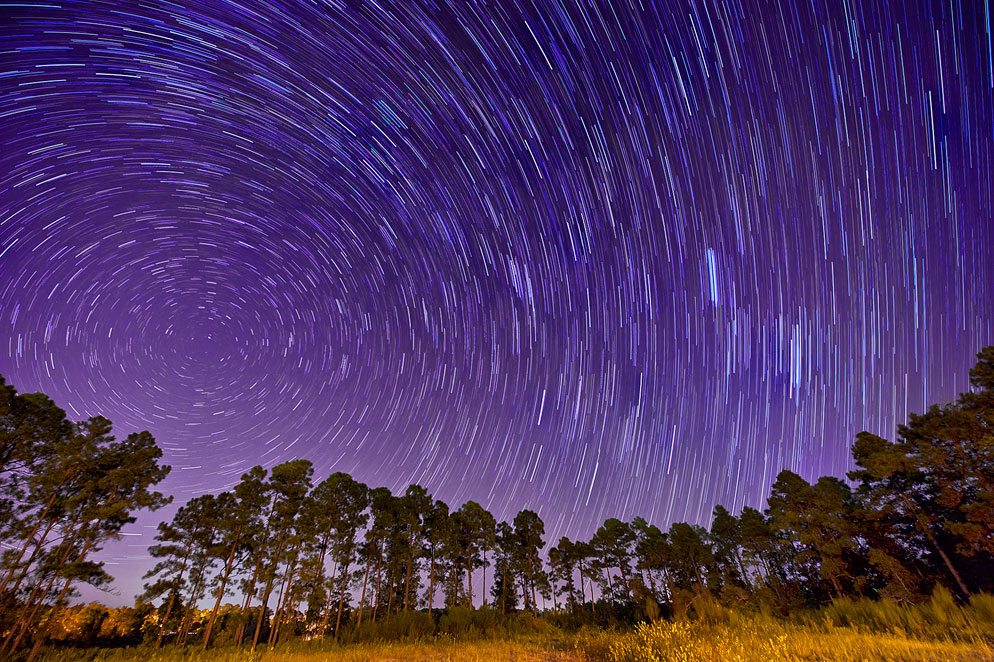
The fullness of the star trail stacking will be dependent upon whether you spend only a few minutes making exposures or are out shooting all night. If you want star circles, you'll need to be out shooting all night and then stack the images.
Composition
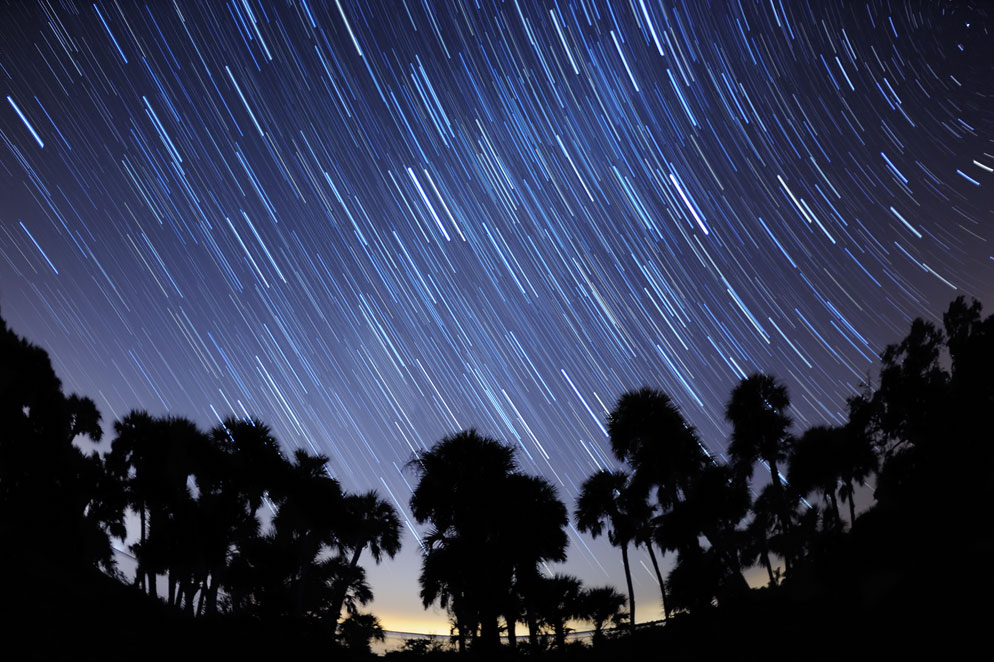
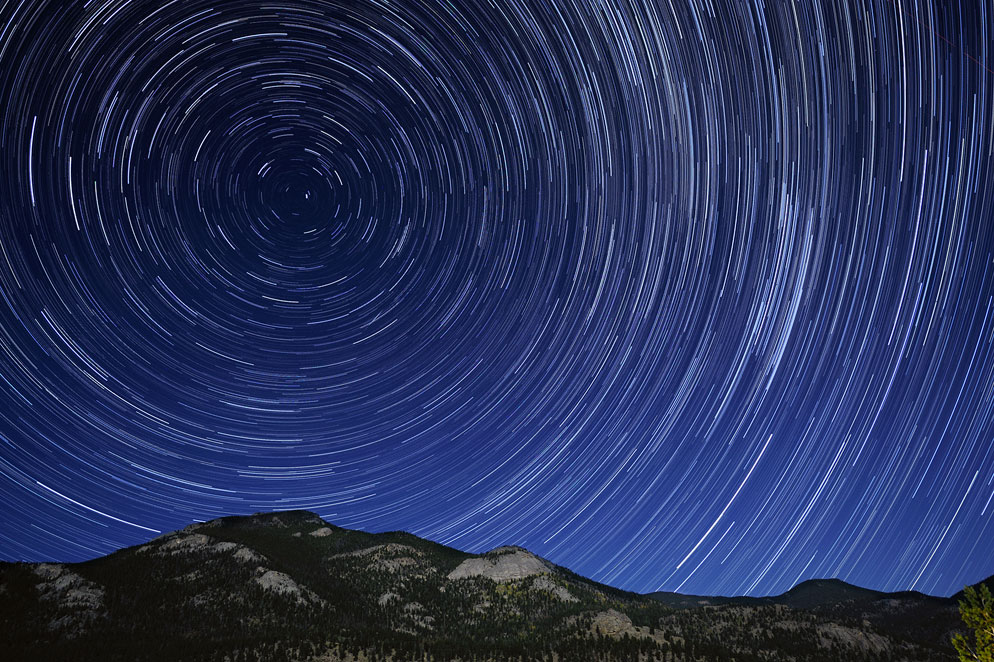
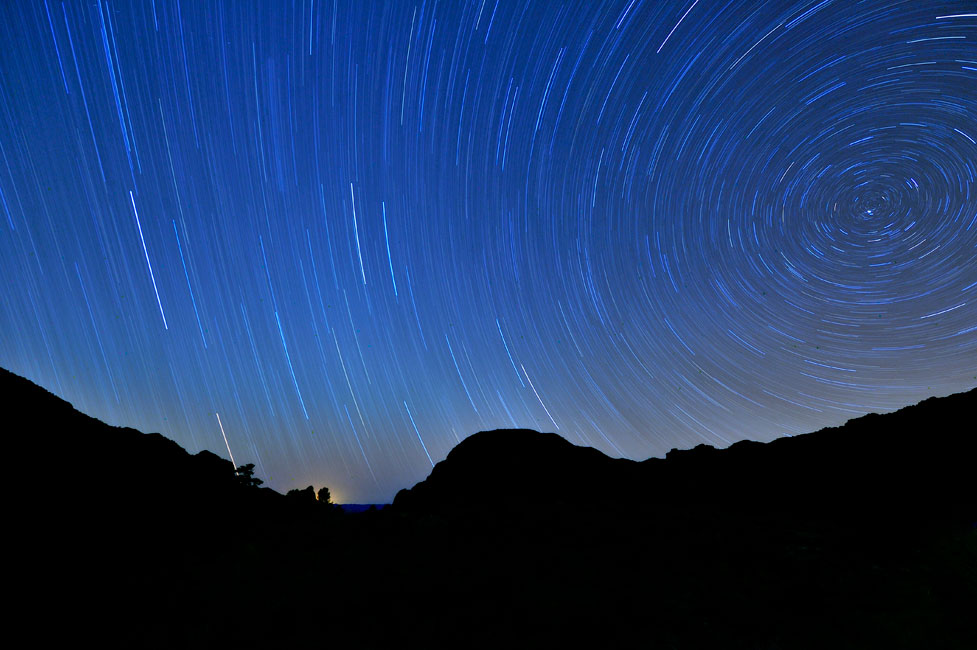
Where you point the camera in the night sky will determine the shape of the star trails in your final image. For instance, if you center your composition on the North Star (Polaris), you’ll end up with concentric circle star trails. Other compositions can produce arc shaped star trails. In her image of star trails photographed at the Indian River Lagoon (image #3), Deborah positioned the camera facing west to create a “falling star” look.
Many of the photographs that are taken of star trails are captured using wide-angle lenses, so interesting “terrestrial” foreground elements can be incorporated into the composition. Some of these foreground subjects will make ideal silhouettes, while others would benefit from a little exposure (natural or man-made).
The foreground elements in a composition can be more important than the sky in the background. Diana says she usually reserves very dark locations or places with interesting foregrounds such as Big Bend National Park or Arches National Park for star trail imagery.
There are a variety of techniques that can be used to light the foreground for a star trail image, including making exposures at different settings and combining them as an HDR image, light painting the foreground using a flashlight or similar constant light source, and painting with light using a Speedlight. For Speedlight light painting, you manually “pop” the Speedlight's Flash button to fire it, doing so multiple times, to spread the light across the entire area to be illuminated, while the camera’s shutter speed is set to BULB.
It is always a good idea to make a few exposures, especially if you’re light painting to fill in the foreground area with visible detail. Its important to keep the light source moving during the exposure so you don’t create hot spots.
UFOs in your star trails
Sometimes, when you look at your final star trail photographs, you might see other lights crossing the sky in a different direction. These “UFOs” are just the lights from airplanes, helicopters or satellites.
Tips to Making Better Star Trail Photographs $
-
Bring a flashlight with you, so you can easily see the camera to change settings while shooting at night. If you’re planning on photographing the sky all night, bring a chair so you’ll be comfortable.
-
Use a compass and star charts to help you determine where to place the camera so you get the type of star trail movement across the photograph that you want.
-
Place the camera on a steady tripod, and use a cable release to “snap” the pictures, to keep from causing vibrations during the long exposures.
-
Include foreground elements in your composition for a more interesting photograph.
-
Lock the focus.
-
Use a low ISO to keep noise to a minimum.
-
Use shorter exposures when possible, even though you may end up making more images to stack together, as this will also keep noise to a minimum.
-
Turn ON the camera’s Long Exposure Noise Reduction feature.
-
Shoot test exposures to see exactly what f/stop and shutter speed (or length of time with the camera set on BULB) will produce a well-exposed image. Use the camera’s histogram to check exposures.
-
Close the eyepiece shutter to keep stray light from entering via eyepiece.
-
Shoot RAW (NEF) so you can easily make adjustments in post-production.
-
Turn OFF the LCD display to conserve battery power.