Photographing Backyard Birds
Using SnapBridge and Camera Control Pro 2 for remote capture
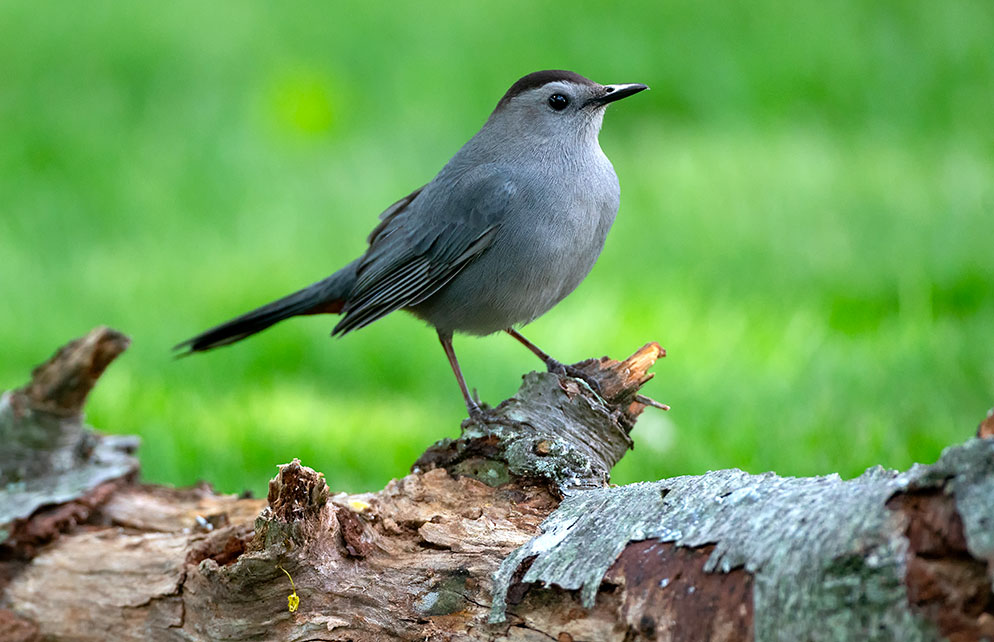
A Grey Catbird stands on a branch that's been placed on the grass as a prop. Z 7, 500mm f/4, 1/2500 of a second, f/4.5, ISO 2000, manual exposure, Matrix metering. Image capture via Camera Control Pro 2.
While I would normally be setting myself up for photographing Major League Baseball, rock concerts and my favorite migratory birds spending the warm weather on Long Island, NY, USA, I’ve found myself at home, like everyone else, not being able to get out to do the things that I really love. And like so many other photographers, looking for ways to stay creative, especially when we’re faced with challenging situations like being quarantined in the wake of a C0VID-19 pandemic.
Inspired many years ago by New York City based photographer Peter B. Kaplan who did a lot of bird photography in his backyard in the latter years of his career, I’ve always contemplated getting a bird feeder to lure in small birds and take on the challenge of photographing them. I finally decided to take the leap and do it, as there’s not much else to do but stay home right now.
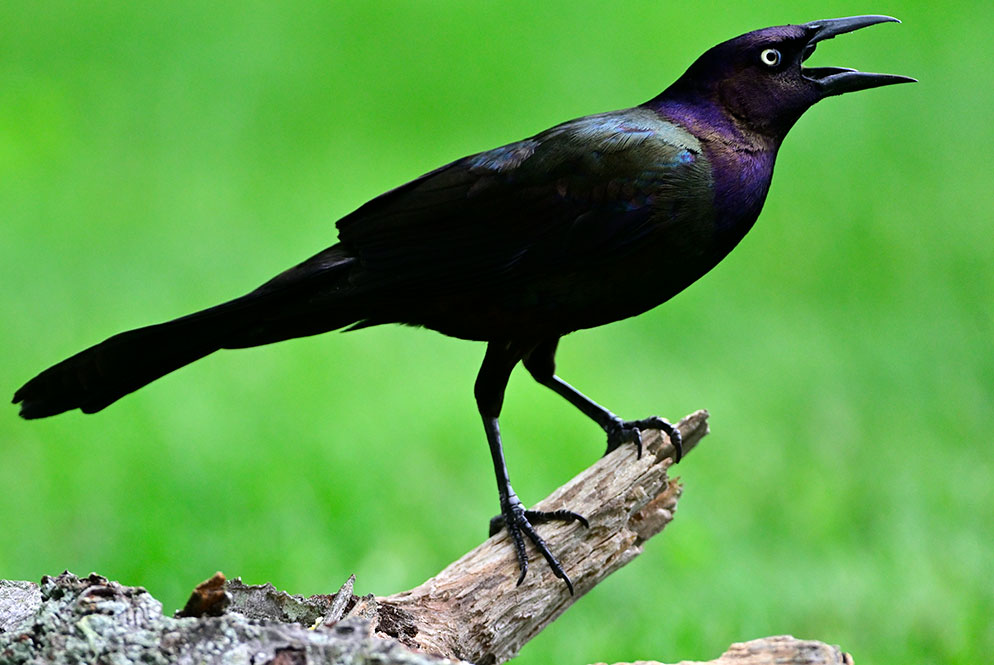
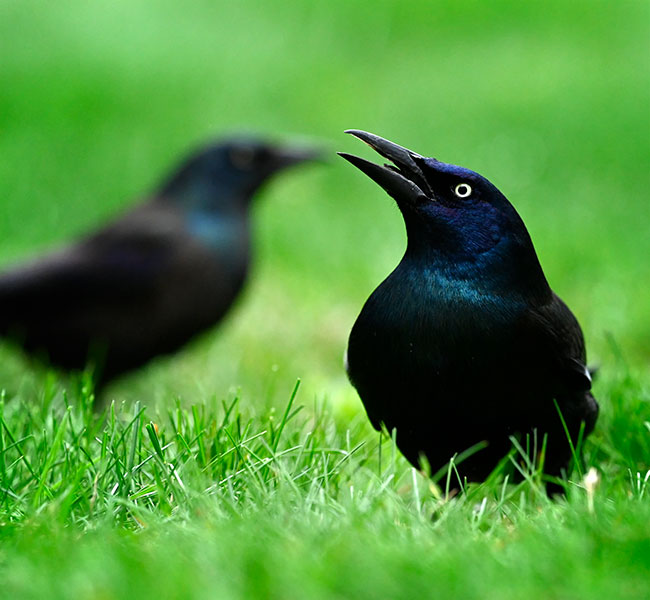
A Grackle stands on a branch. Z 6, 500mm f/4.0, 1/5000 of a second, f/5.0, ISO 2000, manual exposure, Matrix metering. Image capture via Camera Control Pro 2.
I give a lot of credit to bird loving photographers who take on the task of trying to create images of the small, high-speed, erratic creatures that fly through backyards everywhere in search of a tasty meal or nesting nearby.

A female Northern Cardinal in the foreground and a male Northern Cardinal in the background. Z 6, NIKKOR Z 70-200mm f/2.8 VR S at 170mm focal length, 1/1600 of a second, f/5.0, ISO 1600, manual exposure, Spot metering. Image capture via Camera Control Pro 2.
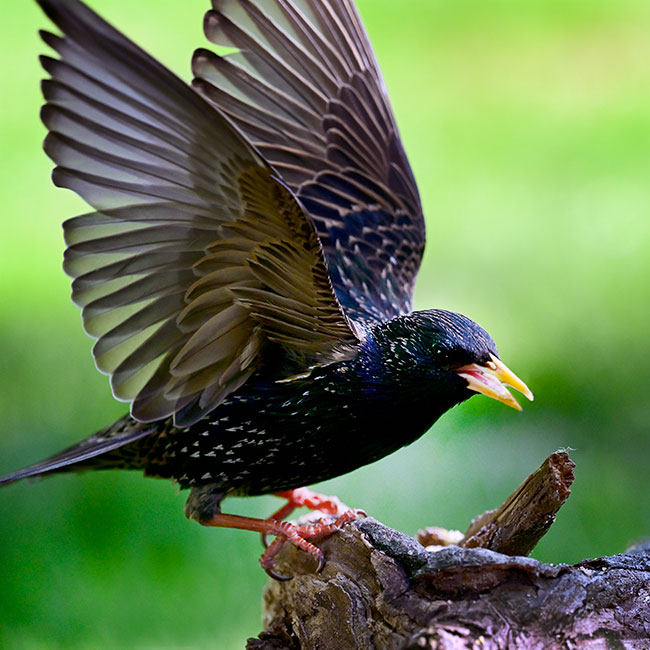
A European Starling spreading its wings, showing the translucent nature of the wings. Z 6, NIKKOR Z 70-200mm f/2.8 VR S at 175mm focal length, 1/5000 of a second, f/4.5, ISO 2000, manual exposure, Matrix metering. Capture via Camera Control Pro 2.
Gear Choice
My biggest challenge was that most of my gear was locked up in my office, meaning I was limited in my choice of cameras, lenses and remote accessories that I could use. I had my Z 6 and Z 7 mirrorless cameras along with a lot of wide angle NIKKOR lenses. The longest Z NIKKOR lens I had was the NIKKOR Z 70-200mm f/2.8 VR S.
Later I thought to grab my dad’s old 300mm f/4 and an original 500mm f/4 AF NIKKOR out of storage which worked perfectly with my Z cameras via the FTZ mount adapter.
Of course the toughest part of all this was the realization that you can’t just walk in front of these tiny wild birds and have them sit and pose for you. That’s when my mind immediately went to a world I’m very familiar with, which is remote photography. My first question was ‘how do I get my camera close enough and still be able to trigger it remotely?’ Using Nikon’s SnapBridge app., of course, which lets you remotely access your camera from a compatible smartphone.
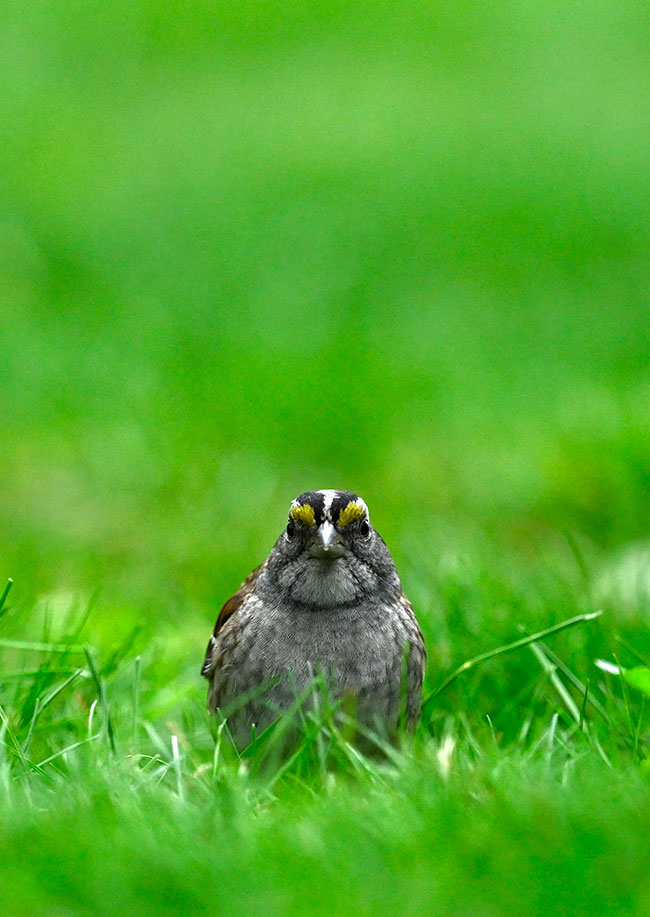
A White Throated Sparrow in the grass, stares directly at the camera. Z 7, NIKKOR Z 70-200mm f/2.8 VR S at 200mm focal length, 1/1250 of a second, f/4.0, ISO 2500, manual exposure, Matrix metering. Image capture via SnapBridge.
That was enough to motivate me to go to the store and grab several bird feeders and feed for the birds in my local area and start a new personal project: #BackyardBirds.
Once I got into the groove of shooting, as much as I was making really nice pictures one frame at a time, I wanted more control of the camera and to capture bursts of images in real time.
In the studio, we use Nikon Camera Control Pro 2 (CCP2) software to shoot product photography tethered to a laptop. What most people don’t know is that CCP2 software allows you to remotely control your camera to shoot stills and video while being able to access practically every camera setting from metering modes, frame rates to file format and so much more.

Birds like Grackles have wonderfully colorful feathers that shimmer when the light hits them. Z 6, NIKKOR Z 70-200mm f/2.8 VR S at 140mm focal length, 1/6400 of a second, f/6.3, ISO 1000, manual exposure, Center-weighted metering. Image capture via Camera Control Pro 2.
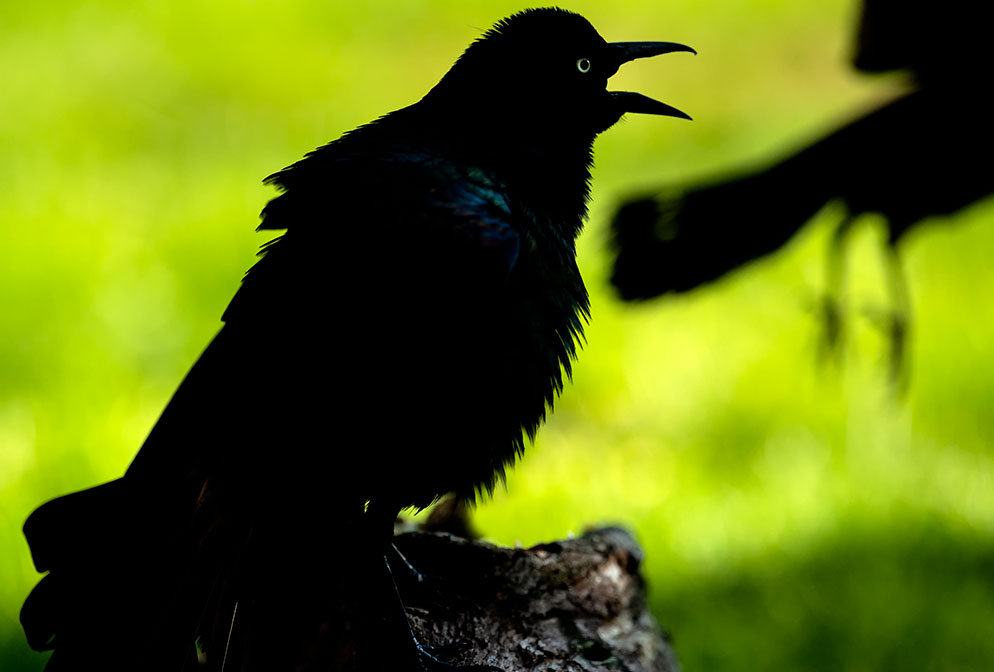
A Grackle stands on a branch, mostly in silhouette. In the background, another Grackle is taking off, flying out of the frame. Z 6, NIKKOR Z 70-200mm f/2.8 VR S at 175mm focal length, 1/5000 of a second, f/4.0, ISO 1000, manual exposure, Matrix metering. Image capture via Camera Control Pro 2.
Problem solving
Now I was really starting to get on a path where I could truly create the images of birds I initially envisioned. The only additional purchase I made was a 15 foot USB cable to connect the laptop (with myself inside my home) to the camera on the other end, which was placed outdoors with the birds.
It’s so important to remember that with every personal project, especially when you’re trying something new, it may take time for problem solving and experimentation. The beauty in that is not only do you learn but you get inspired to try different things and take chances.
When it comes to quick little birds, you have no choice but to sit back, watch and learn. Like any other genre in photography you have to do your homework. From online research to just studying the bird’s daily behaviors, it all becomes an important part of the process. I’ll even reach out to friends who have more experience with these backyard birds than I do, like Diane Berkenfeld (a co-worker of mine who is the editor of L&E) and Nikon Ambassador Ron Magill, a zoologist and photographer at Zoo Miami in Florida, in the USA. Asking questions of experts is how we all learn and I’ve had so many along the way!
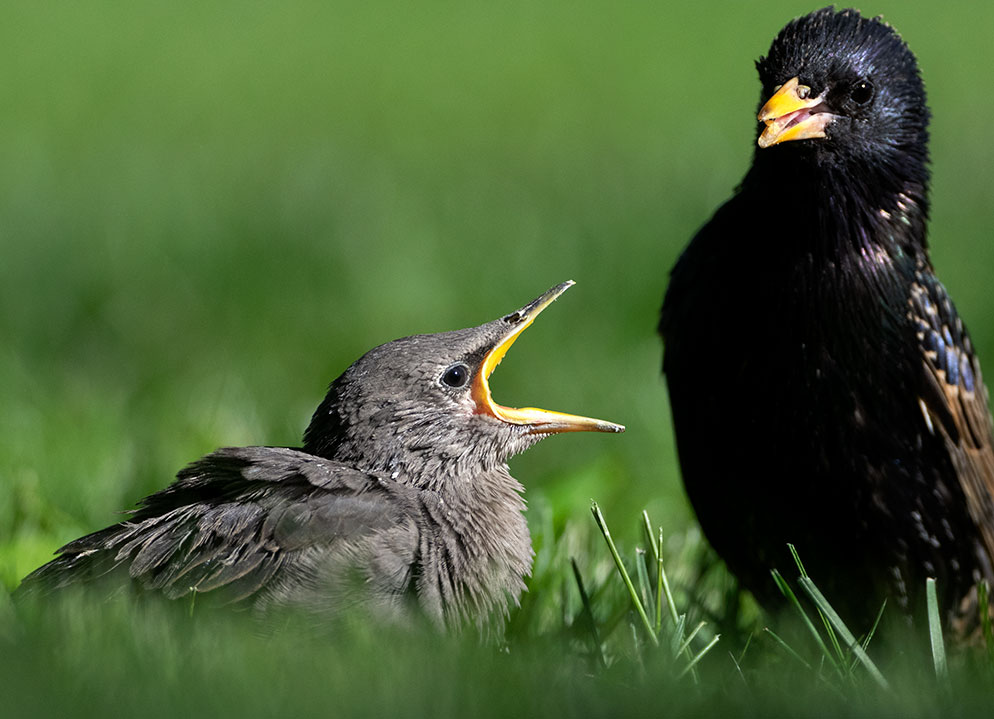
A juvenile European Starling noisily lets its parent know that a meal is expected. Z 7, 500mm f/4 with the camera set to DX Crop, which increases the effective focal length to 750mm, 1/5000 of a second, f/5.6, ISO 800, manual exposure, Matrix metering, Image capture via Camera Control Pro 2.
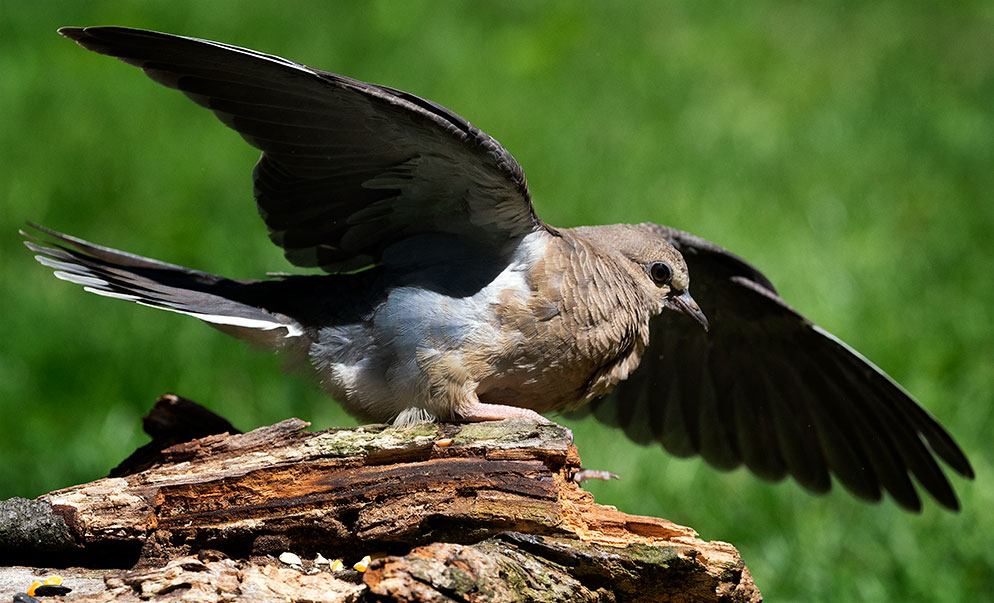
A young Mourning Dove spreads its wings as it is about to take to the air. Z 6, NIKKOR Z 70-200mm f/2.8 VR S at 140mm focal length, 1/6400 of a second, f/6.3, ISO 1000, manual exposure, Center-weighted metering. Image capture via Camera Control Pro 2.
Once the bird feeder was set up, I placed my Z 7 and 70-200mm lens on a tripod. I’d decided on the Z 7 because it’s a higher resolution camera and I thought it might come in handy to be able to crop into the picture a bit and still maintain a hi-res printable image. It was at this point that I got to experience the true speed and dexterity of these birds. And learned that I was going to need a lot of patience. I found after time I got into a groove, and started to capture really nice images.
One thing that bothered me, probably more than anything, was just the physical look of the bird feeder—the metal, the perches, the framework. I found those things to be uninspiring and I immediately tried to come up with ideas that would allow me to disguise the fact that I was in the backyard.
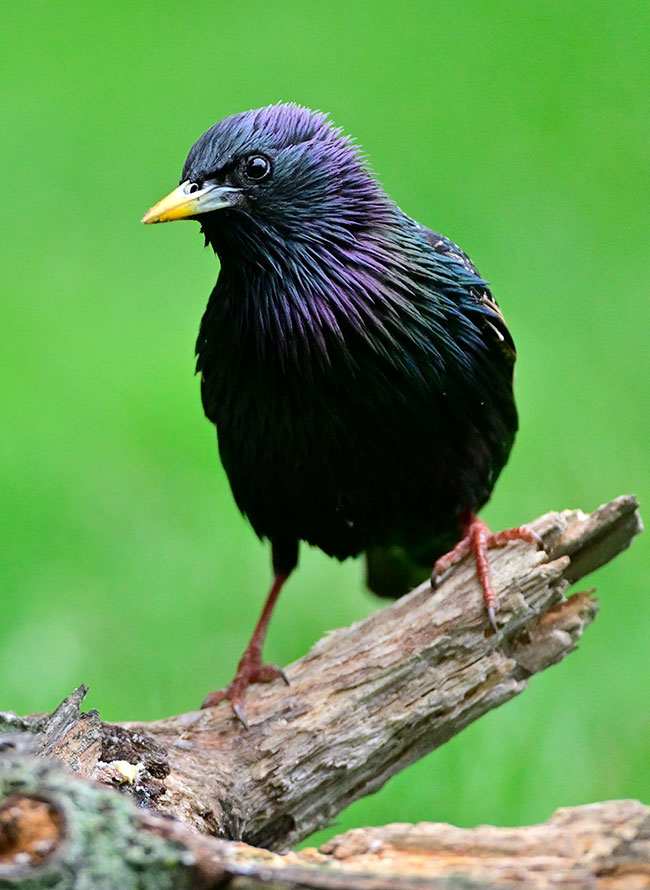
A European Starling stands on a branch. Starlings colorful feathers sparkle when hit by sunlight. Z 6, 500mm f/4, 1/2500 of a second, f/5.6, ISO 4000, manual exposure, Matrix metering. Image capture via Camera Control Pro 2.
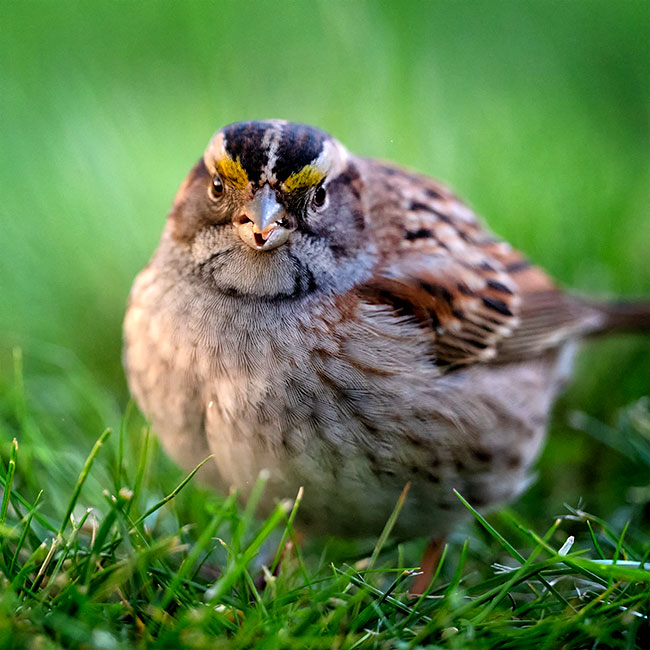
Close up of a White Throated Sparrow in the grass. Z 6, NIKKOR Z 70-200mm f/2.8 VR S at 170mm focal length, 1/2000 of a second, f/3.5, ISO 3200, manual exposure, Spot metering. Image capture via Camera Control Pro 2.
Paying attention to details
One of the greatest tips in photography is to consider your background as well as your foreground and subject, so I immediately went to work on how to lure the birds to a place that I wanted them to be, which would allow me to get the camera that much closer. This meant I needed to mount the camera as close to the ground as possible. I wanted to use the grass behind the birds as my backdrop.
I switched to the Z 6 for much of the shooting because I was able to get the camera where I needed it to be, framing my avian subjects nicely and yet still able to crop when I needed to. The high-speed frame rate along with the quality high ISO shooting capabilities gave me the opportunity to use higher shutter speeds and smaller apertures to get a little more depth of field.
It’s important to keep in mind that these birds average 3 - 6 inches in length so it’s imperative that you get the camera close enough for tight framing, but at the same time realize that if you want to capture them taking flight, you’ll need wider framing.

A Chipping Sparrow coming in for a landing. In the original capture there was more to the frame, but because it doesn't add anything to the overall image, a decision was made to crop the photograph square and only include the bird that was landing and the nearby bird. Z 6, NIKKOR Z 70-200mm f/2.8 VR S at 195mm focal length, 1/1250 of a second, f/4.5, ISO 3200, manual exposure, Matrix metering. Image capture via Camera Control Pro 2.
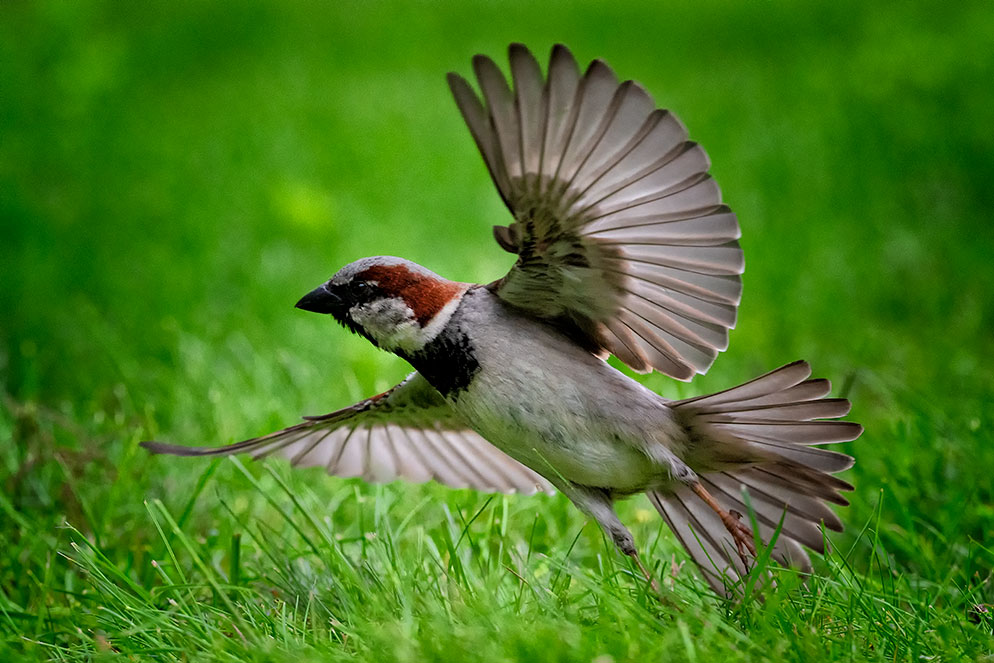
House Sparrow. Ultra-fast shutter speed captures the beauty of the bird's wings as it takes flight. Z 6, NIKKOR Z 70-200mm f/2.8 VR S at 135mm focal length, 1/8000 of a second, f/6.3, ISO 4000, manual exposure, Highlight weighted metering. Image capture via Camera Control Pro 2.
Trust me, they’ll be in the frame one moment and within a split second—in the blink of an eye—they’re gone. In my backyard I have a variety of bird visitors: Sparrows, Grackles, Cardinals, Mourning Doves, Starlings and even a Catbird. One of the keys to enticing birds to your yard is researching which seeds will attract what kinds of birds. I even learned about Suet and the different birds it attracts.
My backyard project immediately became an addiction and I was compelled to shoot every morning and afternoon. I’m constantly coming up with ideas. I placed broken tree limbs in the grass, as an added element of texture. I’d make some photos, start to see redundancy in the actions of the birds and try something new. The more you work to get the images you want, the quicker you can concentrate on important elements like seeing the light and color of the birds and looking for the catchlight in a bird’s eyes. You’ll begin to create images that are more impactful like capturing the beauty of a bird’s wings as they take flight. Remember though, to take a break from shooting every once in a while, which will let you come back with a fresh perspective.
This has been a great learning experience for me and a project that I will continue to enjoy for many years to come. There are so many important things I learned along the way: being patient, doing your homework and realizing you will miss some images but it’s important not to dwell on it. Your time, effort and dedication will pay off. It’s truly amazing how much you can push yourself as soon as you start to see one incredible image after the next. it will fuel you to continue and to try to be more creative.
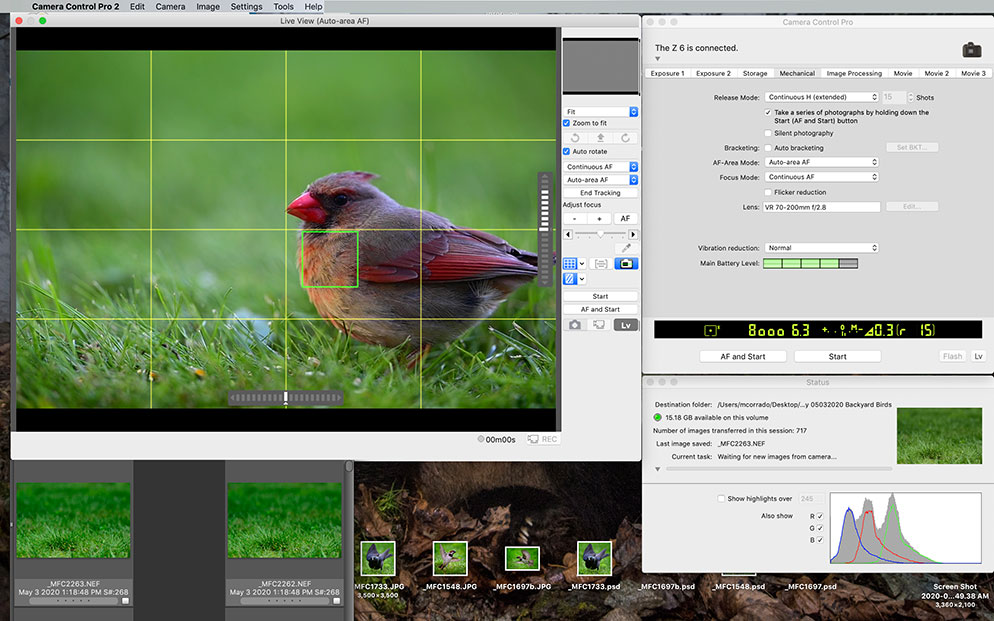
Nikon Camera Control Pro 2 software allows you to connect Nikon DSLRs and Z series mirrorless cameras to a computer to remotely shoot still images and video. You can access all of the camera settings from the computer.
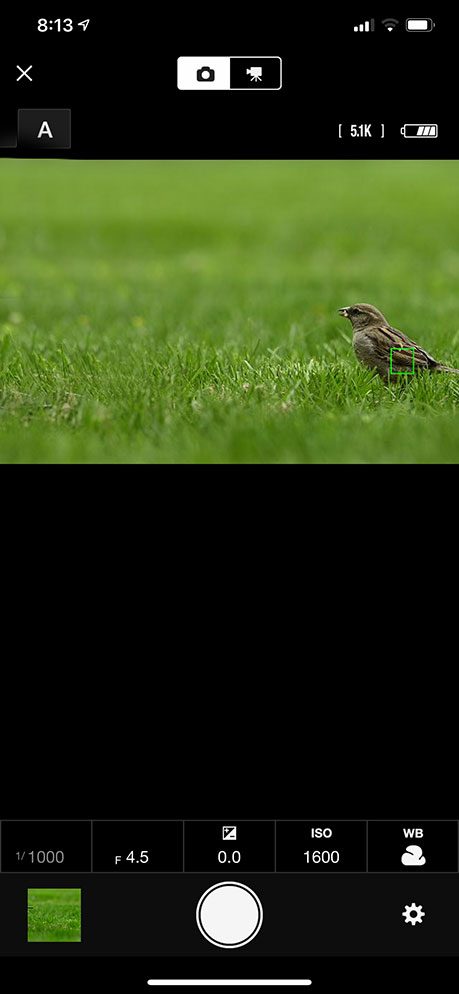
The SnapBridge app is available for compatible iPhone® and Android™-powered smartphones. The app allows users to remotely control their paired camera via Wi-Fi®.
10 Quick Tips:
-
Research which birds are local to your backyard. You’ll want to get the type of feed that they’ll be attracted to. Most small birds will eat black sunflower seeds. For example, Bluejays love peanuts in the shell, Woodpeckers love Suet, Orioles like oranges, Finches like Nyjer, Catbirds, Mockingbirds and Robins like fruit and berries.
-
Download one of the helpful, free apps like Merlin Bird ID available for smartphones that will help you identify and learn about the birds you see and photograph.
-
Layer birdseed in tall grass from the front of the frame to the back to keep the birds within your frame.
-
If you’re autofocusing the lens and want to make sure your camera frame is where you need it to be, use a stick or other small object to frame and find your focus, then remove it once you’ve achieved your desired focus.
-
You don’t need a super telephoto lens. So long as you’re using a full frame Nikon camera, set the camera to DX Crop and increase the effective focal length by 1.5x.
-
Focus on the bird’s eye(s) and watch for the light to strike their eyes so they stand out from the darker head feathers.
-
Don’t let the weather hinder you—use protective rain gear or even a Ziploc or other bag to protect your camera and lens so you can continue to shoot.
-
If you miss a moment, don’t dwell on it, move on—there will be another!
-
Like other genres of photography if you wait for quality light at the right time of day, it makes all the difference.
-
Like any personal project it is important to step away every once in a while. You can easily burn out. You will have great days and blah days so take a break.
Sparrows in slow motion - Sparrows are common birds that can be seen everywhere from backyards and parks to streets and parking lots. Take video as well as still images of the birds that visit your backyard. Slow motion video highlights every minute detail and motion by the birds.
Mike Corrado's title at Nikon USA is senior manager, NPS and pro relations.
More articles by this contributor